A New Dawn; A New Breakfast

Have no fear; things have been delicious and good in my life. Unfortunately, it has all been very chaotic and this has forced me to step away from the stove. Long days and tired nights have led me to fall in love with leftovers. I used to look down on them, but over the last few weeks they’ve grown to become my friends.

Our relationship with food is ever changing. Right now I simply don’t have the time for flair-tastic meals, but that doesn’t mean I’ve succumbed to take out and junk food. I’ve found new, fast, and fulfilling ways to keep my cooking hand strong while maintaining some semblance of sanity. I look forward to the less hectic days once this semester is over when I can find time to get back to my lackadaisical and ingredient heavy kitchen roots, but I’ve found enjoyment in this culinary break.

In the meantime, here is a savory dish I made for breakfast, which is outside the ordinary. I love eggs. I can easily go through a carton in a week. I understand the cholesterol in eggs isn’t necessarily bad, but something tells me the amount I eat is in the higher percentage and teetering on the edge of detrimental. Alas, I had no eggs left this morning, so instead of running to City Market for an egg and tomato breakfast sandwich, I sauntered over to the fruit bowl to try out a new recipe I found last night. It encompasses my love of bananas and avocados, and my sweet tooth gets to join in on the action. No one likes playing third wheel *wink/wink*

I “adapted” the amounts of cream and sugar for the recipe, due to the fact that I was borrowing the neighbor’s cream and I wanted to see if I could get that sweet taste while still drawing back on the amount of sugar. My “adaption” was most delicious and won’t leave you feeling like you’ve been cheated. Plus, it allows the flavor of the whole foods to shine through.


My instagram account is alive and well! Follow me at: jocellyn88

Avocado-Banana Salad (serves 2)

Ingredients
1 avocado, diced
1 banana, diced
1 tbsp ½ tbsp lime juice
1 tbsp ½ tbsp. sugar
3 tbsp 2 tbsp cream (I used half and half)

Instructions
1. Add diced avocado and banana to a bowl.
2. Measure lime juice, sugar and cream into the bowl.
3. Mix ingredients together gently.
4. Serve immediately.

Few things in life are better than cutting into an avocado to find  perfectly ripened, rich and (healthy) fatty perfection.


Peel Away ❤

Jocellyn

Mamma Mia

#instafood

I didn’t have the luxury of growing up in a food driven family. My mom wasn’t the domestic type. I specifically remember one meal she made that left little to be desire. She pulled out a delicious smelling, but not homemade, loaf of garlic bread from the oven. Hungry and eager to dig in, we quickly noticed that she hadn’t taken the plastic wrap off, creating an inedible layer. I cannot remember if we threw the loaf in the trash compactor, or if we cut it the long way and ate the buttery, garlicky middle—something tells me the latter happened—but I think it highlights my mom’s cooking prowess. Eating out and takeout was the Pulkkinen-Harvey way.  Sorry if you read this, mom: you were great at everything else. Except driving…I digress, I digress!

I got a real dosage of home cooking when I dated this kid named Matt Giglio in high school. Minus the large family, they were the stereotypical, loveable, loud Italians. And there was always food on the table. How he and his sister stayed so skinny, I will never know. Despite my true Haitian heritage, and my very English-German last name, I like to think that if kids are in my future (sweet lord I hope they aren’t!) that I would be of the Italian mom variety. Home cooked meals on the table five nights out of the week, whipped together with love and adoration…and of course a little bit of brassy attitude. The other two nights, if you were curious, would be reserved for a nice restaurant meal and the other would be for leftovers. Yeah, I’ve put a little thought into this.

So, a few nights ago I ignored my pungent fish sauce and decided to go the Italian route. Sorry Asian food, you’ll have to wait. I went with the laziest meal possible, while still being able to keep my culinary muscles flexed. Think of it as an ‘active rest’ day in the kitchen. Folks, you guessed it, I made some pasta. And since I can kind of be an ingredient snob from time to time, I turned my nose up at the jarred, thick, preservative laden sauces that filled the shelves. I find that pasta only feels like a heavy meal when slathered in that red goop, so I ventured out and made my own. Well, I actually slightly modified a Martha Stewart version. Something tells me Stewart isn’t an Italian last name, but her sauce utilizes fresh ingredients, so I figured Mamma Giglio, if she could see me, wouldn’t mind.

Ingredients

  • 2 1/4 pounds unrefrigerated ripe tomatoes (preferably plum)
  • 1/4 cup fresh basil leaves
  • 1 tablespoon flat-leaf parsley
  • 1 tablespoon chopped garlic (from 2 garlic cloves), plus more if desired
  • 1/4 cup extra-virgin olive oil, plus more for drizzling
  • Coarse salt and freshly ground pepper
  • Variation: 1 cap-ful of balsamic vinegar to give it a little punch
  • 1 pound spaghetti or spaghettini
  • Grated Parmesan cheese, for serving (optional)

Directions

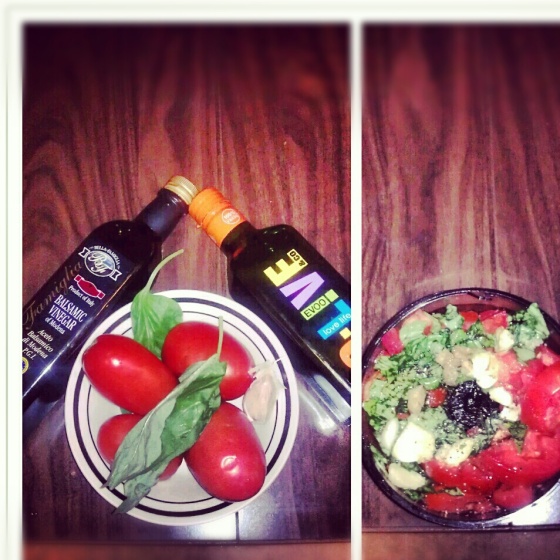
  1. Finely chop tomatoes, basil, parsley,balsamic, and garlic, and mix together with oil (or pulse ingredients, including oil, in a food processor to blend).*The photo above is an example of a halved recipe. If you are doing the small one, and only have a small food processor, you are going to want to do this in two or possibly three batches
  2. Bring a large pot of salted water to a boil. Add pasta, and cook until al dente. Drain pasta, and toss it in a serving bowl with the raw sauce. Transfer to 6 shallow bowls, and drizzle with oil. Serve with cheese.

I like to make the sauce and let it rest for at least fifteen minutes, an hour would be ideal, to let the flavors mingle. This sauce tastes great warmed but, but it is also phenomenal cold. Fresh basil is absolutely necessary in this recipe. The dried kind can’t compare. If you aren’t sure what to do with the leftover basil leaves, which can understandably be a deterrent when buying fresh herbs, make sure to grab a lemon at the grocery store and make some lemon-basil water, which is so refreshing after a workout (yeah, people, I’ve actually been working out!)

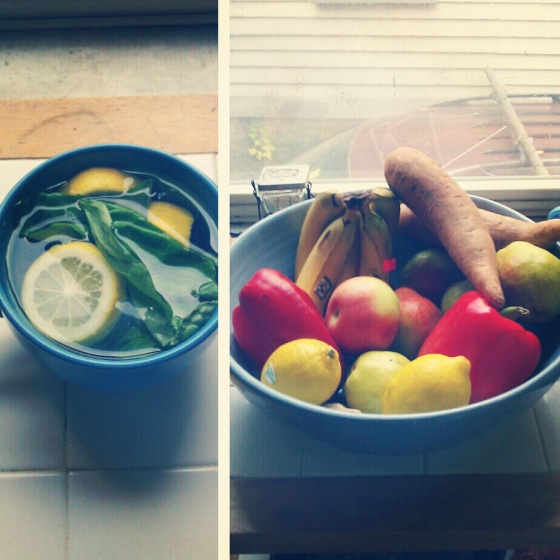
Lemom-basil water and my new fruit bowl. Isn’t it massive and magnificent?!

Peel Away ❤

Jocellyn

Foliage and Butternut Squash

#instasoup

I never truly appreciated New England Fall until I spent my first semester of college at High Point University in North Carolina. I expected the leaves to do their gussied up business of turning all orange and rougey, but they kind of just fell off the tree in a zero climax death. Now I see why people travel up north to stop—dangerously—on the side of the road and take snap shots of our calendar worthy foliage, which is still hauntingly beautiful every single year.

I like fall for many reasons. For one I can pull out my arsenal of cowl neck scarves that sit, unloved, in the closet during the humid months. I can eat a few more sweet treats because all the layers of clothing hide my stomach which had to be at attention for days at the beach. And I can also fill said tummy with a variety of soups. I love soups because they give you artistic leeway in the kitchen, they are generally cheap and easy to make, and slurps are inevitable. Who doesn’t love slurping? So, behold the first soup of the season! It’s a homemade butternut squash recipe from the Whole Foods website.

I’ve never really been a huge squash fan or foe—I don’t really eat it much except during Thanksgiving when it takes on an applesauce form—so I was hesitant. Much to my surprise, the soup turned out superb.

It has a wholesome simplicity to it. It’s not filled with a myriad of flavors, but it isn’t bland either. Sprinkle a little salt and pepper on top and you have yourself a warm, soothing bowl that can be a main dish or paired with half a sandwich or even chicken. Tip: if you have the self-control to hold off, make it during the evening and don’t eat it until the following afternoon. Just like you shouldn’t immediately cut into meat that’s hot out of the oven, soup also needs time to settle, which allows the flavors to mingle.

Whole Food’s Classic Butternut Squash Soup

Ingredients:

  • 2 tablespoons extra-virgin olive oil
  • 1 carrot, diced [I used 2 carrots and omitted the celery; I detest celery]
  • 1 celery stalk, diced
  • 1 onion, diced
  • 4 cups cubed butternut squash, fresh or frozen [I got more than 4 cups worth for $3.00]
  • 1/2 teaspoon chopped fresh thyme
  • 4 cups low-sodium chicken broth [Since this soup doesn’t need lots of expensive ingredients, look for the best broth you can find!]
  • 1/2 teaspoon fine sea salt
  • 1/2 teaspoon ground black pepper

Method:

Heat oil in a large soup pot. Add carrot, celery and onion. Cook until vegetables have begun to soften and onion turns translucent, 3 to 4 minutes. Stir in butternut squash, thyme, chicken broth, salt and pepper. Bring to a boil, reduce heat and simmer until squash is fork-tender, about 30 minutes. Use an immersion blender [the best gadget you could possibly buy] to purée soup. Alternatively, let the soup cool slightly and carefully purée in batches in a traditional blender.

Peel Away ❤

Jocellyn
Brined and Fine: The Best Chicken Around

It was the summer of ’06, and I was in the midst of changing hormones, understanding my femininity, and rebelling at almost every level. My friend’s mother surprised us with a trip to NYC to go shopping for clothes—the ultimate dream of any fifteen year old girl. It was our last shopping day and we stumbled upon an outdoor sale of massive proportions. I had just purchased a “totally authentic” Juicy Couture pink track suit (we all remember those, right?) and I was getting a bit hungry. Ignoring my friend’s mother’s strict instructions to not eat any of the street food—whenever the carnival came around town she also gave warned us about talking to the “carnies”, so full of wisdom was Mrs. Fontaine—I stole away to a chicken stand when she wasn’t looking. Placed haphazardly on bamboo sticks, the chicken was juicy and fragrant, with hints of pink insides and oozing green pus (which my friend said reminded her of her infected belly button ring); hunger inspires stupidity in man. Neglecting the obvious signs of salmonella, I munched away greedily. Mrs. Fontaine was less than impressed and I spent the next ten days firmly glued to the toilet seat, unable to keep in Gatorade or broth, regretting that oh so delicious and misguided decision.

Out of fear, I didn’t eat chicken for many months. My mom forced me to start eating it again, but I always found it too dry. If only I could find a chicken recipe that would match the juiciness of the chicken from the street vendor, but spare me the week of lower intestinal havoc. Although I’ve made many satisfying chicken recipes over the last several years, I think this one just has to be number one. The inside was juicy and flavorful—a bit salty but not terribly overpowering. The skin was soft, but not gooey, and absolutely succulent; move aside, crispy rotisserie chicken skin, for there’s a new hen in town.

What really made this humble poultry the piece de resistance was a slow, 30 hour marinating brine bath.

Check out this article for the science behind the wonderful world of brining.

Instagram ❤

This recipe was featured on Smitten Kitchen (so you know it’s going to be good) and she slightly adapted it from Nigella Lawson.

2 cups buttermilk (or soy “buttermilk)**
5 garlic cloves, peeled and smashed
1 tablespoon table salt
1 tablespoon granulated sugar
1 1/2 teaspoons paprika, plus extra for sprinkling (I used Hungarian, a smoked one would also be delicious)
Lots of freshly ground black pepper
2 1/2 to 3 pounds chicken parts (we used all legs)
Drizzle of olive oil
Flaked or coarse sea salt, to finish

Whisk buttermilk with garlic, table salt, sugar, paprika and lots of freshly ground black pepper in a bowl. Place chicken parts in a gallon-sized freezer bag (or lidded container) and pour buttermilk brine over them, then swish it around so that all parts are covered. Refrigerate for at least 2 but preferably 24 and up to 48 hours.

When ready to roast, preheat oven to 425 degrees. Line a baking dish with foil (not absolutely necessary, but Nigella suggested it and I never minded having dish that cleaned up easily). Remove chicken from buttermilk brine and arrange in dish. Drizzle lightly with olive oil, then sprinkle with additional paprika and sea salt to taste. Roast for 30 minutes (for legs; approximately 35 to 40 for breasts), until brown and a bit scorched in spots. Serve immediately

**If you don’t know where to buy buttermilk (or need to go with the non-dairy alternative) you can make something similar. For every cup of milk, put in one tablespoon of lemon juice. Stir together and let the mixture sit for 10 minutes. You’ll notice it starts to curdle. There, now you have butter milk’s first cousin, so there is no excuse not to try this out!

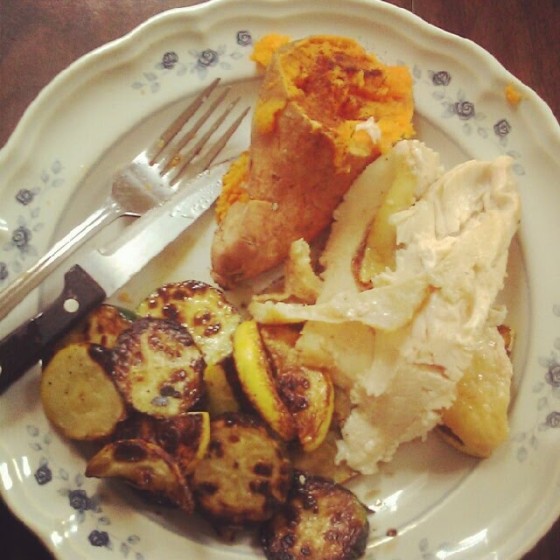
Throw  together some pan seared vegetables, a plump sweet potato (I won’t tell anyone if you want to use a bit of butter and cinnamon), and you’ve got yourself a hearty dinner that’s sure to make your taste buds gyrate!

Peel Away ❤

Jocellyn
You can have your decadence and chia seeds too!

My first foray into the world of chia seed pudding was a touch to ambitious, like attempting a swan dive when all I had done was a splash inducing cannon ball. Despite my seemingly crunchy food habits, I had not yet acclimated my taste buds to the slightly nutty essence of chia seeds, nor their inherent sliminess; the raspberry chocolate pudding was a throw away disaster. For months the package of chia seeds sat untouched, until I got the courage to try them again by adding them to green smoothies.  Soon I was finding excuses to add a pinch here and there, when last week I decided it was time to try out the pudding again. You know, get back on the horse. It needed to be the healthy, but still naughty tasting, a pudding that felt like a decadent dessert, but could also be eaten in the morning, for it’s never too early for sweets.

First I needed a good base: something thick and substantial. I set about making chia gel which consists of 1/3 a cup of chia seeds and 2 cups of water. Chia seeds like liquid. Once submerged the seeds bulk up and slowly start excreting a gel. If you are on the fly you can make chia gel in 15 minutes, but it’s best to let it sit for at least two hours. The cool thing about chia gel is that you can keep it in an airtight container in the refrigerator for up to three weeks—no rush to use it! It also starts to lose the nutty flavor (which is great for me) and starts to smell slightly sweet.

After I had my gelatinous base, I started to think of all the great things that go into a pudding. There is the richness, but also the creaminess. A duh: bananas and peanut butter. My secretly healthy, but delicious tasting pudding baby was conceived.

PB & Banana Chia Pudding (2 hearty batches)

½ cup of Chia Gel

2 Tbs of Peanut Butter

1 Sliced Banana

1 Small Capful of Vanilla Extract

A Couple Dashes of Cinnamon

Place all the ingredients into a food processor. Checking every so often on the banana slices, blend until you’ve reached a smooth consistency. Let it sit in the refrigerator for up to 1 hour to allow the flavors to incorporate and settle.

Filled with healthy fats (peanut butter), fiber and potassium (banana), and omegas (chia seeds), this treat is also the gift that keeps on giving. Much like flax seeds, chia seeds encourage (no, practically enforce) you to drink water, which in turn keeps you even more dehydrated and less bloated. I finished up the pudding before I went to work and easily drank a 32 ounce bottle of water. Honestly, how could it get any better?

Peel Away ❤ Jocellyn
Slow Cookers: The Imaginary Chef in the Kitchen

Instagram

Apologies if this offends you, but for months slow cookers screamed mom status—much like the mighty casserole, which I refuse to make unless I have some Rugrats under foot. Slow cookers sang the (reasonable) defeated cries of the woman tired of carting her kids back and forth to extracurricular activities; the woman who was just trying to get something onto the table. A slow cooker just wasn’t for me. I was young, energetic, with time on my hands and a passion for frantic kitchen forays. And then I looked at my school schedule, and my upcoming work schedule (26 hours a week, baby), and realized perhaps the slow cooker, the original set it and forget it machine, needed to have a supporting role in the kitchen.

Prejudice aside, the wheels started turning. Why, I could throw everything into it during the morning, go to class, come back to check in, and go about my day. Six to eight hours later I would have a fragrant smelling home and enough food to last me throughout the week. My weekly soup obligation started to seem like less of a hassle, and, of course, the 21 year old in me saw the potential of still having a hearty dinner(s) during the weekend, despite a moderate hangover. Seeing as I have to pass through the kitchen to reach the bathroom, the hallowed resting spot for the all mighty Tylenol bottle, even angry at the world, mildly still inebriated me could toss a few things into the slow cooker and go back to bed. Hallelujah!

I was in no position to buy a slow cooker, so casually I called my mom, asked her about her life and nonchalantly asked if she, oh, had an unused slow cooker around. She did. And it’s probably older than me, because I have never seen her use it. Sturdy and made before the time of planned obsolescence, the old gal started up fine.

In keeping in line with frugal meals, I chose a spicy black bean soup. The ingredient list was simple: a pound of black beans soaked overnight, some spices, and good quality chicken broth made sweet kitchen love for six hours. Much like the rice and beans, the soup was humble looking, but surprisingly pleasant on the taste buds. While I don’t think anyone under the age of 30 should resort to making a tuna casserole (or any sort of casserole), I think all 20-soemthings can find a place in their heart—and kitchen—for this safe and efficient appliance.

Peel Away ❤

Jocellyn

Fish Tacos

As of late, I’ve been having a love affair with avocados. Curvaceous, soft, subtle—I love this green being. There is something satisfying about scoring the inside and gently manipulating the peel to easily pop out perfect dice size pieces. And taking the bumpy peel off is quite exciting as well. Whew, stop me now!

I’ve been trying to find ingenious ways to sneak this green goddess into my meals. Its soft mouth feel, fitting for a teething baby, offsets harder foods, and the cooling affect is a welcome reprieve against hot, spicy sauces; I’m kind of a baby when it comes to anything about a “medium” level.

Naturally, tacos seemed to be the way to go. Last week I made some delectable pork tacos, but this week I was craving some fish. Please, tell me what could have been a better way to merge my love of seafood and the overabundance of corn tortillas I had lurking above the microwave.

I love tacos because you can use your creativity by going after the long, laborious recipes featuring different sauces and slaws and spices. Or you can be lazy: sprinkle some taco seasoning on your meat, and while that cooks on the stove top (or in the oven, which is even less labor involved) slice up a few vegetables and warm up your tortillas. Crack open a cold drink and enjoy the texture party thumping away in your mouth.

Easy-Peasy, Lime-Squeezey Fish Tacos

Haddock

Taco Seasoning (pre-packaged for ultimate laziness)

1 Lime

1 Avocado

1 Roma Tomato

1 Can of refried beans (will only be using a small amount)

4 Tortilla (2 per meal)


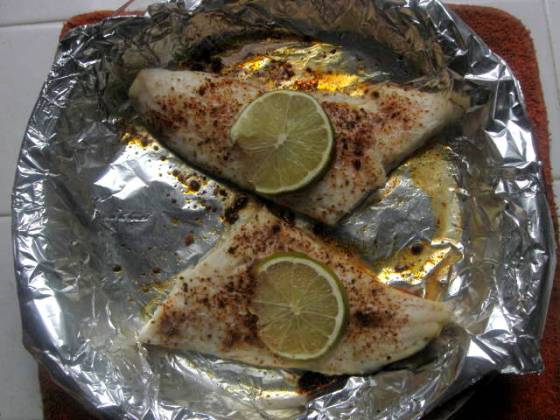
1 Preheat oven to 325 F. While the oven heats up, put fish (haddock, tilapia, or whatever floats your net) in a tinfoil lined oven safe dish. Coat with cooking spray or olive oil. Sprinkle fish with taco seasoning and place one slice of lime over each filet. Cook for 20-25 minutes.

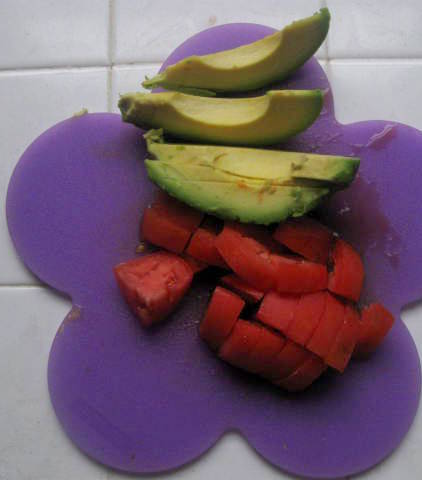
2 While the fish cooks, prepare your innards. In this case, slice up ½ an avocado and ½ a Roma tomato. Put Aside. Wrap up the other half of the avocado and tomato for later on. To best preserve the avocado, save the side with the pit for later use. Rub a little bit of lemon juice on the exposed flesh. This will cut down on oxidation, which is what turns the avocado that icky brown. Use within 24 hours.


3 Open can of refried beans and microwave according to instructions on the label.

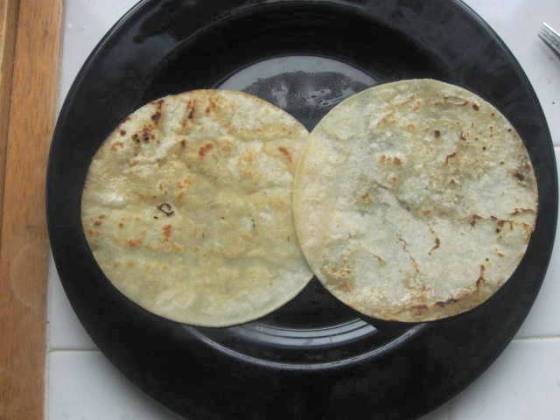
4 Heat up skillet to a notch over medium. Melt small amount of oil or butter (regular or Earth Balance) in the bottom and place the tortilla on top. When the tortilla starts bubbling, flip over with fork. If not crispy enough, flip back over and give it a few more moments. When both sides have been warmed, place on plate. Repeat with a second tortilla.

5 Gently scoop some of the refried beans onto the tortilla and spread, with the backside of a spoon, as evenly as possible. Take care if using corn tortillas, as these are thinner than flour tortillas.

6 When the fish is done cooking, remove from oven and let cool for 3 minutes. While cooling, start to assemble the tortillas. Place all items onto one side to make folding easier. Add on your tomatoes and avocados. When fish is cool, add to the pile.

7 Gently fold the slices and insert into mouth. Chew. Swallow. Smile

Fiscal Flash: for this meal I bought ½ a pound of haddock and spread it out over 4 tacos (2 per meal.)  Haddock is a flakier fish, but I left the skin on, which kept everything together. The ½ pound of haddock only cost me $3.37. The avocado was $1 and one Roma tomorrow is probably equal to 30 cents.  I believe one lime is 40 cents as well. The tortillas I already had, along with the refried beans (a can of the Full Circle Organic line is $1.39/ can, and I only used a minuscule amount.) Rounding the total cost up to $5.07, I ended up paying $1.275 per serving. That’s taco bell prices, but the quality is obviously better.

Peel Away ❤

Jocellyn

Morning Cookin’

I’m a morning person, meaning the daylight doesn’t send me flying back under my sheets as if I were Nosferatu (except when I’m royally hung over, in which case a total eclipse would be most appreciated.) However, I like to really blend into my mornings. I hate being rushed. It’s not that I’m the high maintenance type of girl that needs hours to apply layers of makeup—mascara, maybe, and I’m out the door—or finagle her hair into a fun do—clearly, I don’t have a lot to work with—but I like to spend my mornings mentally preparing myself for the day, which means ample time for oil pulling, a shower that isn’t hurried, time to make 3 outfit changes incase I’m feeling a little chaotic, and moments to listen to a few dubstep beats that are owning my wobbly soul at the time.

An original player in the Dubstep genre 🙂

Can I have her legs, please?


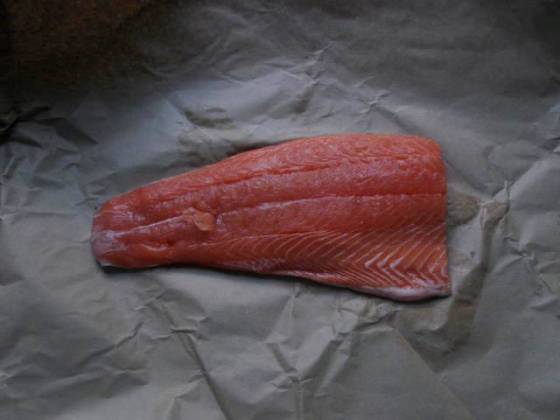
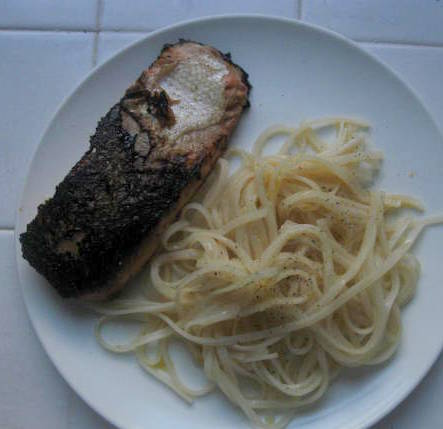
Sometimes inspiration poor planning means I have to get extra beauty sleep in order to wake up and concoct some meal. Plus, I totally dig the morning sunlight for photos. Here is a lunch/dinner I found that will hold me over for 4 meals! It all starts with salmon. During my pesco days I adored this pink fish. I just couldn’t get enough of it. And then I was kind of over it after trying haddock that wasn’t breaded, battered, and fried into oblivion. Salmon took a back seat. I find salmon to be a finicky fish to cook, despite protests that it’s so easy to work with. Mind you it isn’t difficult, per say, but if you walk away for a hot second to long you’ll come back to a pink slab of tough-mess. Edible, but not savory. I’ve charred more than my fair share of salmon, and I admit it’s still a fish I’m working on. Questionable-ness aside, this is hands down the most delicious salmon meal I’ve ever had.  The glaze was perfect: not too sticky and not too sweet. Unlike the partners on Dancing With the Stars, the glaze and salmon meld together, taking care to work in harmony and not outshine the other one.

Fiscal Flash:  don’t be financially intimidated by this meal. I’ll be honest and say I don’t have the money to buy wild Alaskan salmon which is well managed, full of all the good stuff, and yada, yada, yada. If you are eating salmon on a regular basis then farmed might not be the way to go, but for the occasional meal a little bit of farmed salmon is not going to kill you, just like the occasional Big Mac won’t send a healthy person into cardiac arrest. It may seem tempting and easy to buy frozen filets, which I’ve done before, but don’t be afraid  to venture on over to the fish counter. Look for salmon per pound. Those perfect portion filets might seem the good way to go, but I was able to get 1.20 Lb of salmon for $7.50, whereas each 6oz salmon filet would have cost me $4; you do the math per pound and per serving.  Finally, to skin or not to skin? I’m personally a huge fan of the skin. It tastes great and is absolutely gorgeous to look at, like marbling on a perfectly aged steak (which I haven’t actually seen in real life, but it looks amazing on T.V.)  If you are frying or grilling salmon keep the skin on to make flipping it easy. If you are oven baking it you can go skinless. As with all cook, it’s really up to you, but you’ll likely only find skinless on the pre-portioned selection.

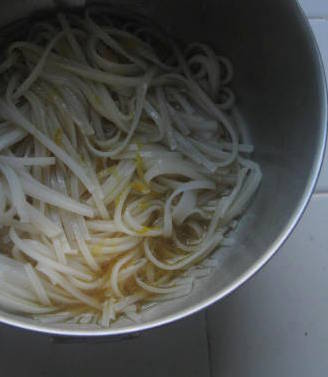
To accompany the fish I used rice noodles, which are very rapidly becoming a key player in my shopping cart. For gluten-free ladies and gents these are a god send. Even better, you don’t have to stand over a hot pot making sure they don’t stick together.  Just place them in a bowl, pour boiling water on top, and let them sit for 5-8 minutes (or whatever the package says.) Drain and give them a quick rinse with cold water. They are a little bland on their own, but great covered in whatever sauce and glaze you are making.

Okay, enough of the nitty gritty. Savor these pictures and check out the recipe.

Gorgeous!


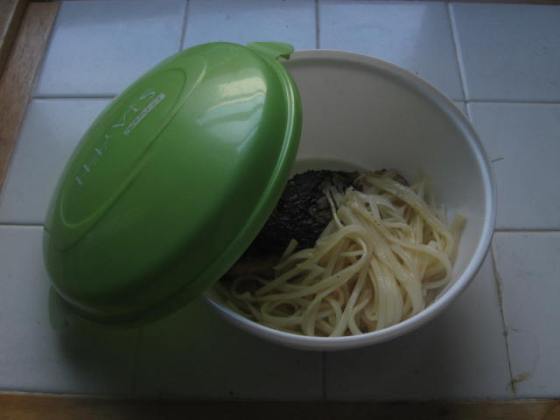
Noodles soaking up the sauce. I let them rest for about 20 minutes and drained the excess.

Lunch!

What happens after “the talent” is done getting pics taken.

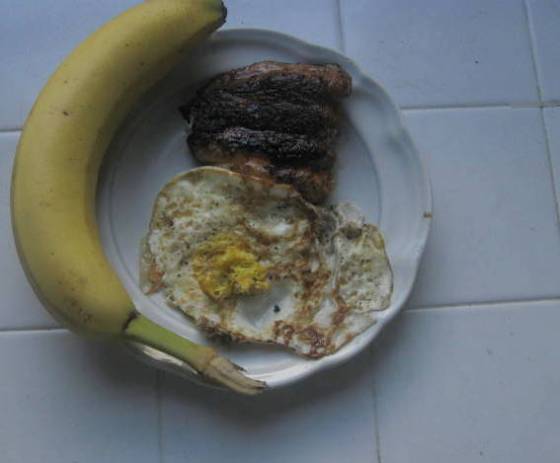
A mix-and-match breakfast! I used the “runt” piece as a taste tester. Boy, I was soooo amped for lunch


Peel Away ❤

Jocellyn


If only living was as smooth as my smoothies!

It has been a longgggg past few days. About a week ago my world was rocked when shocking rumors were brought to my attention. I was so angry, embarrassed, and humiliated. I hadn’t felt this way since high school, or, well, maybe since the ex-neighbor car incident (hint, hint: it involved the same people. Shock and awe.) I was a complete mess and kind of zombie like, which, if you know me, is pretty uncharacteristic. Thankfully, my good girl friends were there to lift me up; it is so nice to have others lift you up from time to time, as it saves you the hassle and sweat 😉

We celebrated ladies night with gusto, stumbled the night away, and I got to wish a friend a happy birthday.  It was just what the doctor ordered.

But I was still a little upset about the events and starting to feel sick.  If I can catch a cold while it’s still in breathing-on-the-back-of-my-neck mode, I will usually only have a day of feeling horrible and not a week! So I’ve been taking the last few days easy (not that my summer has been exactly a non-stop work fest…ahem), eating what I please, watching Netflix, and sleeping when necessary. Frankly, a cat would be jealous. But in the midst of my laziness and mild emotional eating debauchery (a post to come on that soon), I found the time to make several green smoothies when I was hankering for something sweet to drink while I watched Pretty Little Liars **spoiler alert: I knew it was Mona! …Yes, I’m a bit behind**

You may already know this, but I love green smoothies. In case you’re popping in for the first time, lemme catch you up to speed. When I first started eating healthy, green smoothies were a very clean drink I added to my diet. So, I guess you could say they are kind of like my first born child that can do no wrong. You can whip one up in three minutes, they aren’t nearly as cumbersome to clean up after compared to fresh juices, you get to use the fiber, and you aren’t stuck with a smelly trash can full of left over pulp.

This is what my typical green smoothie looks like. I’ll rotate the fruit around (frozen blueberries are finally cheap enough to buy again and the kiwi was an unexpected add in, but I gotta get to them before the fruit flies do!), and sometimes I’ll use some ground flax seed in place of chia—though I’m totally digging chia at the moment—but this is the basic set up.

I’ve been doing this by feel for the past year and a half, meaning I don’t use exact measurements except with the chia and flax (1 tablespoon). I know what fruit flavors don’t come through as strongly, which, depending on the mood, may mean I’m less liberal with the spinach. I know if I’m using chia seeds to add them in last; if you put them in first they will get stuck at the bottom of the blender and it’ll be a pain in the cheekies to clean. I know pineapple leaves a horrible stringy mess which irritates my texture phobic mouth and gets stuck all up in my teeth. But I have faith you’ll figure out the perfect ratio for yourself!

I really enjoy the energy these drinks give me, and how clean they are, but every now and then I like to treat myself to a “naughtier” smoothie. I was marinating some Moo Ping earlier (yup, the Thai food kick is still going strong), and I had a lot of leftover coconut milk. And thus the coconut milk smoothie happened. This one has a lot more calories since I wasn’t using water at the base, but coconut milk has some great benefits (unfortunately #10 isn’t terribly useful for me!). Consider it a very special treat or make it as a breakfast or lunch for a day you know you are going to be busy and might not be able to snack as often or get in a full meal. I haven’t had a coconut milk smoothie in about 7 months, so I think I can take the calorie and fat hit.

Coconut Milk & Blueberry Smoothie

1 Cup of Coconut Milk (see what I mean! Don’t make this on a daily basis)

1 Banana

1-2 handfuls of fresh or frozen blueberries

1 TBS Chia Seeds


Pour in coconut milk and sliced up bananas. Blend for a few sections. Then add in blueberries and chia seeds. Blend until mixed together, when there is no more white showing.
Peel Away ❤

Jocellyn
Cooking for the ones you love: Why Italian mamma’s are always so happy

Sometime last week I was making dinner and wondering why it just felt different. Was I still easing my way into the new kitchen? Was I too lazy? Were the issues I was dealing with hampering my appetite?  These were all legitimate and probable ideas, but then it dawned on me halfway through. Chris was out, coming home sometime, and I wasn’t exactly making dinner for us. I was making dinner for me, myself, and I. And he would stumble in sweaty from basketball, ask what pans I was using, and then make dinner for himself.

Perhaps loving him made eating healthier, especially in the early stages, more enjoyable. I wasn’t nourishing my own body but someone else. I had another set of taste buds to please (or to wallow with me when I made a stinker of a meal.) Perhaps that is why I still regularly save a small spoon or fork full for him whenever I try out a new Thai-inspired sauce, which I’ve been doing quite often as of late. Part of me thinks I’m still showing off, but maybe I’m just trying to keep that small sliver of mutual satisfaction alive.

So this epiphany, though bittersweet, has inspired me to add another dimension to living a healthy lifestyle. It goes beyond healthy eating, exercise, mental clarity, and self esteem. You got to do it from the heart. And I mean do it from the heart for someone else. Love yourself. Love yourself a lot. But don’t forget to love others too when it comes to working out (invite a friend on a run or to yoga class!) or trying a new all natural skin care recipe with a gal pal (there is always so much left over anyway) or, in the case of this blog post, cooking a meal for someone (only the Pope should have to eat alone.) This other person doesn’t need to be a lover. It can be an old friend, a new friend, a sick or down classmate/co-worker, or your parents. Even if it is once a week—or even once a month—try making a commitment to that person (or large group of people) to get together and cook for each other. I know I had tons of fun making cookies and sangria when the girls came over awhile back. The meals don’t need to be extravagant. Bring your seven layer dip, your favorite mixed drink recipe, or your mom’s perfect chicken marinade. There’s no need for a theme, or dressing up, or pomp and circumstance (unless you want all of those , in which case pomp away.) As long as you are surrounded by people you enjoy (people that will gladly help you wash dishes) then I think that is love enough!

Okay, enough with the sap. You want a sappy black woman talking? Go watch Oprah, mmmhmmmm.

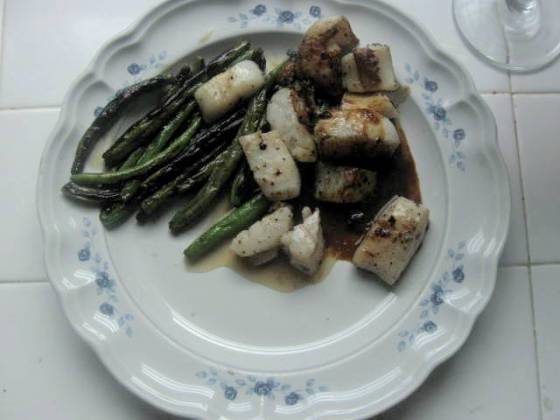
Here’s the recipe for the aforementioned Thai style meal: an orange-soy glaze over scallops.  Where I shop a pound of large scallops (not the small ones) is $16.99 and  that is probably on the cheap end. Check to see if your market sells scallop pieces, which I get for $7.99/LB! Your stomach won’t be the wiser, but your bank account will be much, much happier.


Seared Peppered Scallops with Orange-Soy Glaze

From Bon Appetit (don’t tell my internship supervisor @ EatingWell!)

“ Ingredients

4 tablespoons peanut oil, divided (I used coconut oil. Feel free to use whatever you have around)

1 1/2 pounds sea scallops, patted dry with paper towels

2 teaspoons ground peppercorn blend, or ground black pepper

2 garlic cloves, finely chopped (about 2 teaspoons)

1/2 cup orange juice (freshly juiced if possible!)

1 tablespoon soy sauce

1/2 teaspoon (packed) grated orange peel

Preparation:

Heat 3 tablespoons oil in large skillet over high heat. Sprinkle scallops with pepper blend and salt. Working in batches, add scallops to skillet in single layer; sauté until brown on outside and just opaque in center, about 2 minutes per side. Transfer scallops to plate, leaving drippings in pan.

Add garlic and remaining oil to drippings in skillet; stir 30 seconds. Add orange juice, soy sauce, and orange peel. Boil until sauce thickens to syrup, stirring frequently, about 2 minutes.

Pour sauce over scallops and serve.”

I served this with a plate of green beans covered in salt and pepper that I cooked up in the cast iron. Okay, I do admit this recipe might be the one you make with a LONG TERM significant other or a best friend that you’ve known for ages, you know the one that held your hair back as you puked. Why? This sauce is to die for. Like, lick the plate clean to die for—I speak from experience. Your besties or beau will love you (well, they might have a disturbed look on their faces), but the first date and new found friend might, well, not call you back for round two!

Peel Away ❤

Jocellyn