A New Dawn; A New Breakfast

Have no fear; things have been delicious and good in my life. Unfortunately, it has all been very chaotic and this has forced me to step away from the stove. Long days and tired nights have led me to fall in love with leftovers. I used to look down on them, but over the last few weeks they’ve grown to become my friends.

Our relationship with food is ever changing. Right now I simply don’t have the time for flair-tastic meals, but that doesn’t mean I’ve succumbed to take out and junk food. I’ve found new, fast, and fulfilling ways to keep my cooking hand strong while maintaining some semblance of sanity. I look forward to the less hectic days once this semester is over when I can find time to get back to my lackadaisical and ingredient heavy kitchen roots, but I’ve found enjoyment in this culinary break.

In the meantime, here is a savory dish I made for breakfast, which is outside the ordinary. I love eggs. I can easily go through a carton in a week. I understand the cholesterol in eggs isn’t necessarily bad, but something tells me the amount I eat is in the higher percentage and teetering on the edge of detrimental. Alas, I had no eggs left this morning, so instead of running to City Market for an egg and tomato breakfast sandwich, I sauntered over to the fruit bowl to try out a new recipe I found last night. It encompasses my love of bananas and avocados, and my sweet tooth gets to join in on the action. No one likes playing third wheel *wink/wink*

I “adapted” the amounts of cream and sugar for the recipe, due to the fact that I was borrowing the neighbor’s cream and I wanted to see if I could get that sweet taste while still drawing back on the amount of sugar. My “adaption” was most delicious and won’t leave you feeling like you’ve been cheated. Plus, it allows the flavor of the whole foods to shine through.


My instagram account is alive and well! Follow me at: jocellyn88

Avocado-Banana Salad (serves 2)

Ingredients
1 avocado, diced
1 banana, diced
1 tbsp ½ tbsp lime juice
1 tbsp ½ tbsp. sugar
3 tbsp 2 tbsp cream (I used half and half)

Instructions
1. Add diced avocado and banana to a bowl.
2. Measure lime juice, sugar and cream into the bowl.
3. Mix ingredients together gently.
4. Serve immediately.

Few things in life are better than cutting into an avocado to find  perfectly ripened, rich and (healthy) fatty perfection.


Peel Away ❤

Jocellyn

Mamma Mia

#instafood

I didn’t have the luxury of growing up in a food driven family. My mom wasn’t the domestic type. I specifically remember one meal she made that left little to be desire. She pulled out a delicious smelling, but not homemade, loaf of garlic bread from the oven. Hungry and eager to dig in, we quickly noticed that she hadn’t taken the plastic wrap off, creating an inedible layer. I cannot remember if we threw the loaf in the trash compactor, or if we cut it the long way and ate the buttery, garlicky middle—something tells me the latter happened—but I think it highlights my mom’s cooking prowess. Eating out and takeout was the Pulkkinen-Harvey way.  Sorry if you read this, mom: you were great at everything else. Except driving…I digress, I digress!

I got a real dosage of home cooking when I dated this kid named Matt Giglio in high school. Minus the large family, they were the stereotypical, loveable, loud Italians. And there was always food on the table. How he and his sister stayed so skinny, I will never know. Despite my true Haitian heritage, and my very English-German last name, I like to think that if kids are in my future (sweet lord I hope they aren’t!) that I would be of the Italian mom variety. Home cooked meals on the table five nights out of the week, whipped together with love and adoration…and of course a little bit of brassy attitude. The other two nights, if you were curious, would be reserved for a nice restaurant meal and the other would be for leftovers. Yeah, I’ve put a little thought into this.

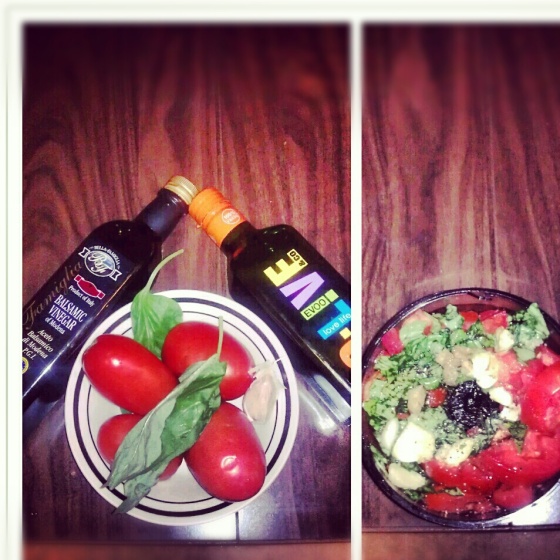
So, a few nights ago I ignored my pungent fish sauce and decided to go the Italian route. Sorry Asian food, you’ll have to wait. I went with the laziest meal possible, while still being able to keep my culinary muscles flexed. Think of it as an ‘active rest’ day in the kitchen. Folks, you guessed it, I made some pasta. And since I can kind of be an ingredient snob from time to time, I turned my nose up at the jarred, thick, preservative laden sauces that filled the shelves. I find that pasta only feels like a heavy meal when slathered in that red goop, so I ventured out and made my own. Well, I actually slightly modified a Martha Stewart version. Something tells me Stewart isn’t an Italian last name, but her sauce utilizes fresh ingredients, so I figured Mamma Giglio, if she could see me, wouldn’t mind.

Ingredients

  • 2 1/4 pounds unrefrigerated ripe tomatoes (preferably plum)
  • 1/4 cup fresh basil leaves
  • 1 tablespoon flat-leaf parsley
  • 1 tablespoon chopped garlic (from 2 garlic cloves), plus more if desired
  • 1/4 cup extra-virgin olive oil, plus more for drizzling
  • Coarse salt and freshly ground pepper
  • Variation: 1 cap-ful of balsamic vinegar to give it a little punch
  • 1 pound spaghetti or spaghettini
  • Grated Parmesan cheese, for serving (optional)

Directions

  1. Finely chop tomatoes, basil, parsley,balsamic, and garlic, and mix together with oil (or pulse ingredients, including oil, in a food processor to blend).*The photo above is an example of a halved recipe. If you are doing the small one, and only have a small food processor, you are going to want to do this in two or possibly three batches
  2. Bring a large pot of salted water to a boil. Add pasta, and cook until al dente. Drain pasta, and toss it in a serving bowl with the raw sauce. Transfer to 6 shallow bowls, and drizzle with oil. Serve with cheese.

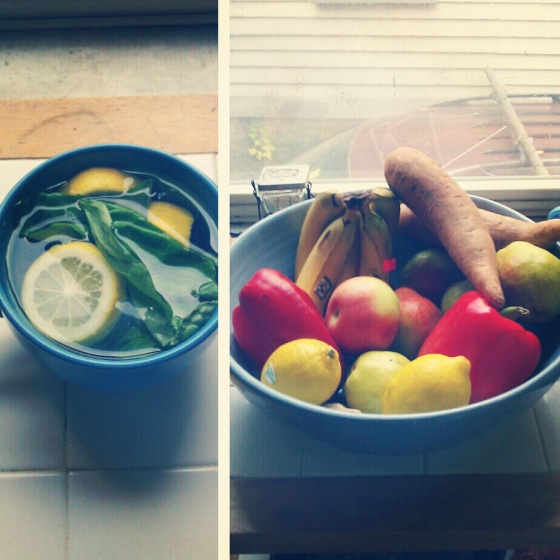
I like to make the sauce and let it rest for at least fifteen minutes, an hour would be ideal, to let the flavors mingle. This sauce tastes great warmed but, but it is also phenomenal cold. Fresh basil is absolutely necessary in this recipe. The dried kind can’t compare. If you aren’t sure what to do with the leftover basil leaves, which can understandably be a deterrent when buying fresh herbs, make sure to grab a lemon at the grocery store and make some lemon-basil water, which is so refreshing after a workout (yeah, people, I’ve actually been working out!)

Lemom-basil water and my new fruit bowl. Isn’t it massive and magnificent?!

Peel Away ❤

Jocellyn

Foliage and Butternut Squash

#instasoup

I never truly appreciated New England Fall until I spent my first semester of college at High Point University in North Carolina. I expected the leaves to do their gussied up business of turning all orange and rougey, but they kind of just fell off the tree in a zero climax death. Now I see why people travel up north to stop—dangerously—on the side of the road and take snap shots of our calendar worthy foliage, which is still hauntingly beautiful every single year.

I like fall for many reasons. For one I can pull out my arsenal of cowl neck scarves that sit, unloved, in the closet during the humid months. I can eat a few more sweet treats because all the layers of clothing hide my stomach which had to be at attention for days at the beach. And I can also fill said tummy with a variety of soups. I love soups because they give you artistic leeway in the kitchen, they are generally cheap and easy to make, and slurps are inevitable. Who doesn’t love slurping? So, behold the first soup of the season! It’s a homemade butternut squash recipe from the Whole Foods website.

I’ve never really been a huge squash fan or foe—I don’t really eat it much except during Thanksgiving when it takes on an applesauce form—so I was hesitant. Much to my surprise, the soup turned out superb.

It has a wholesome simplicity to it. It’s not filled with a myriad of flavors, but it isn’t bland either. Sprinkle a little salt and pepper on top and you have yourself a warm, soothing bowl that can be a main dish or paired with half a sandwich or even chicken. Tip: if you have the self-control to hold off, make it during the evening and don’t eat it until the following afternoon. Just like you shouldn’t immediately cut into meat that’s hot out of the oven, soup also needs time to settle, which allows the flavors to mingle.

Whole Food’s Classic Butternut Squash Soup

Ingredients:

  • 2 tablespoons extra-virgin olive oil
  • 1 carrot, diced [I used 2 carrots and omitted the celery; I detest celery]
  • 1 celery stalk, diced
  • 1 onion, diced
  • 4 cups cubed butternut squash, fresh or frozen [I got more than 4 cups worth for $3.00]
  • 1/2 teaspoon chopped fresh thyme
  • 4 cups low-sodium chicken broth [Since this soup doesn’t need lots of expensive ingredients, look for the best broth you can find!]
  • 1/2 teaspoon fine sea salt
  • 1/2 teaspoon ground black pepper

Method:

Heat oil in a large soup pot. Add carrot, celery and onion. Cook until vegetables have begun to soften and onion turns translucent, 3 to 4 minutes. Stir in butternut squash, thyme, chicken broth, salt and pepper. Bring to a boil, reduce heat and simmer until squash is fork-tender, about 30 minutes. Use an immersion blender [the best gadget you could possibly buy] to purée soup. Alternatively, let the soup cool slightly and carefully purée in batches in a traditional blender.

Peel Away ❤

Jocellyn
…and all we need is a fixed gear bike

#Instagram Because I’ve been too lazy to charge my camera batteries 0:-)

I’m going to pull the infrequently used hipster card out of my wallet and throw it down on the table. I was into mason jars before this whole craze blew up. I swear. Which means when people are throwing away their mason jars tricked out in lace designs and gold matte spray paint—geesh, blasphemy, why don’t we just start burning hotel Bibles or something—I’ll still be prominently featuring my non-bastardized version in the kitchen cabinet.

During the summer of 2011, when I worked at the Goodwill, someone brought in a bunch of mason jars, lids still intact, which I scooped up the moment they went on sale. They’re great glasses to have: sturdy, thick lipped to make Beyonce jealous, and rustic. They come in all shapes and sizes and willingly accept smoothies, leftovers, salads, spa water, and cocktails to-go. But never wine. Never, ever, ever wine. Whip out the good glasses for that! Though, you might be able to make an exception for sangria….

Lately I’ve been moving away from the  liquid-only mind set, and thus, the rumors are true, I have been spotted heating up ball jars of left over Thai noodles and nourishing quinoa meals. For class on Thursday, which I scampered into at the last minute, fending off a rough night of Le Vielle de Ferme Rose (13.5%) and a strong Vodka  Redbull, I sheepishly took sips of water from my big girl mason jar and preoccupied my woozy mind by tending to a regular size jar, which I filled with layers of tomatoes. Stacked in alternating colors, I salvaged these beauties from the reduced produce bin at City Market. Drizzled in a drop of olive oil and a generous helping of balsamic vinegar, I rotated the jar the between my hands to ensure even coverage. After a good two hours of soaking, I broke into them during the afternoon shift at my workstudy job. By then the world didn’t seem like such a bright, cruel place.

You can have your decadence and chia seeds too!

My first foray into the world of chia seed pudding was a touch to ambitious, like attempting a swan dive when all I had done was a splash inducing cannon ball. Despite my seemingly crunchy food habits, I had not yet acclimated my taste buds to the slightly nutty essence of chia seeds, nor their inherent sliminess; the raspberry chocolate pudding was a throw away disaster. For months the package of chia seeds sat untouched, until I got the courage to try them again by adding them to green smoothies.  Soon I was finding excuses to add a pinch here and there, when last week I decided it was time to try out the pudding again. You know, get back on the horse. It needed to be the healthy, but still naughty tasting, a pudding that felt like a decadent dessert, but could also be eaten in the morning, for it’s never too early for sweets.

First I needed a good base: something thick and substantial. I set about making chia gel which consists of 1/3 a cup of chia seeds and 2 cups of water. Chia seeds like liquid. Once submerged the seeds bulk up and slowly start excreting a gel. If you are on the fly you can make chia gel in 15 minutes, but it’s best to let it sit for at least two hours. The cool thing about chia gel is that you can keep it in an airtight container in the refrigerator for up to three weeks—no rush to use it! It also starts to lose the nutty flavor (which is great for me) and starts to smell slightly sweet.

After I had my gelatinous base, I started to think of all the great things that go into a pudding. There is the richness, but also the creaminess. A duh: bananas and peanut butter. My secretly healthy, but delicious tasting pudding baby was conceived.

PB & Banana Chia Pudding (2 hearty batches)

½ cup of Chia Gel

2 Tbs of Peanut Butter

1 Sliced Banana

1 Small Capful of Vanilla Extract

A Couple Dashes of Cinnamon

Place all the ingredients into a food processor. Checking every so often on the banana slices, blend until you’ve reached a smooth consistency. Let it sit in the refrigerator for up to 1 hour to allow the flavors to incorporate and settle.

Filled with healthy fats (peanut butter), fiber and potassium (banana), and omegas (chia seeds), this treat is also the gift that keeps on giving. Much like flax seeds, chia seeds encourage (no, practically enforce) you to drink water, which in turn keeps you even more dehydrated and less bloated. I finished up the pudding before I went to work and easily drank a 32 ounce bottle of water. Honestly, how could it get any better?

Peel Away ❤ Jocellyn

When Funds Be Low, Rice and Beans I Go!

I’ve noticed that on my days off I commit myself to cleaning the dishes, scrubbing the tub, and going on a cooking frenzy. Today my cooking was a little bit of this, and little bit of that, and a whole lot of prayer.

A few weeks ago my car decided to throw yet another hissy fit and subsequently went through multiple repairs. The whole ordeal cost my dad nearly two thousand dollars, and my bank account is, well, pretty dismal.  I started my new job yesterday (can I just say how luxurious all the fabrics are!) but I won’t be getting paid for a few weeks. Essentially, I should only ask for money from my parents when I’ve literally eaten my last tomato and bag of frozen vegetables. Eee gad! After fishing through the cupboard I keep all the dry and canned goods, I decided rice and beans was exactly what the your-a-super-broke-college-student doctor would prescribe.

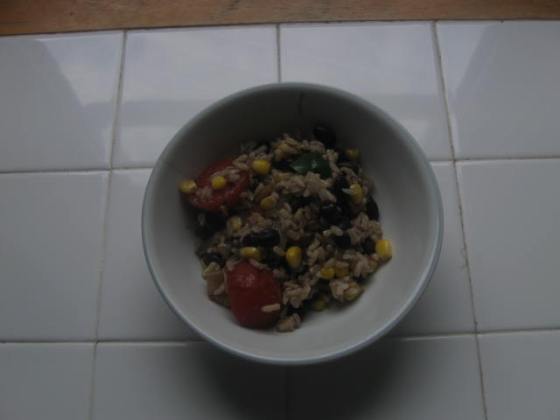
I’m a big planner when it comes to cooking. Every week before I go out I meticulously plot out a shopping list that will carry me through the week. I’ve been known to think of my toes, but that generally only applies to dessert-esque munchies. Dinner ad-libbing leaves me feeling a little frazzled. Thankfully, rice and beans allows for a certain amount personal flair, pizzazz, and culinary showboating. I threw in some corn, a jalapeño, onions, and canned tomatoes, mixed in what I would consider the most en point pot of rice I’ve ever made, and stirred away. Sweet bliss. I now have a humble, though delicious, pot of food that is not only healthy and colorful, but it was insanely cheap and will last me a few days. I’m sure I’ll grow tired of eating it, but at least I have something to eat, which is a lot more than most.

Loving how photogrid makes it easy to document my steps and then share over instagram 🙂

After giving myself a pat on the back, I decided I should at least indulge in my sweet tooth, because she is such a needy little you-know-what. Erring on the side of health, I cracked upon the forgotten can of coconut milk that had been hiding behind the tomatoes. Again, sweet bliss. Into the food processor went the coconut milk, a good amount of frozen raspberries, a dash of cinnamon, and a tiny capful of vanilla extract. Whirr, went the blades; plop, plop, plop, went the pink gobs on their way into the ice cube trays. The kabob sticks, unfortunately, were much stronger than expected, and wouldn’t yield under any of the knives. Instead of pops I ended up with little cubes that I have to hold in my fingers and lick away at; what a horrid life, right? Nevertheless, they are quite delicious, and I’ve always been a fan of finger foods.

Sometimes I wish I could just live in a giant kitchen, because I love that room oh so very much. Living rooms and bedrooms are terribly overrated!


Peel Away ❤

Jocellyn

Morning Cookin’

I’m a morning person, meaning the daylight doesn’t send me flying back under my sheets as if I were Nosferatu (except when I’m royally hung over, in which case a total eclipse would be most appreciated.) However, I like to really blend into my mornings. I hate being rushed. It’s not that I’m the high maintenance type of girl that needs hours to apply layers of makeup—mascara, maybe, and I’m out the door—or finagle her hair into a fun do—clearly, I don’t have a lot to work with—but I like to spend my mornings mentally preparing myself for the day, which means ample time for oil pulling, a shower that isn’t hurried, time to make 3 outfit changes incase I’m feeling a little chaotic, and moments to listen to a few dubstep beats that are owning my wobbly soul at the time.

An original player in the Dubstep genre 🙂

Can I have her legs, please?


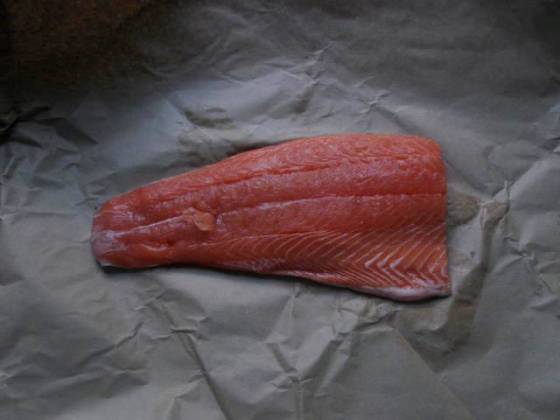
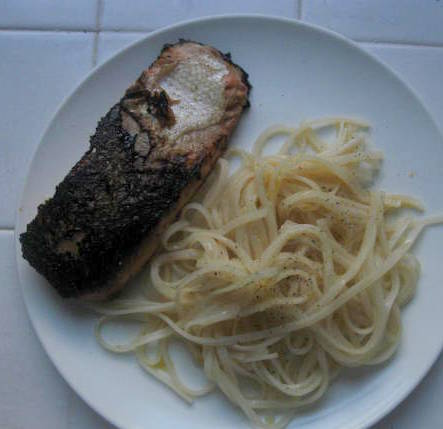
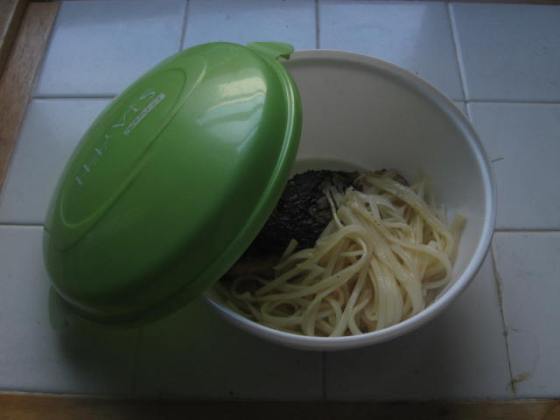
Sometimes inspiration poor planning means I have to get extra beauty sleep in order to wake up and concoct some meal. Plus, I totally dig the morning sunlight for photos. Here is a lunch/dinner I found that will hold me over for 4 meals! It all starts with salmon. During my pesco days I adored this pink fish. I just couldn’t get enough of it. And then I was kind of over it after trying haddock that wasn’t breaded, battered, and fried into oblivion. Salmon took a back seat. I find salmon to be a finicky fish to cook, despite protests that it’s so easy to work with. Mind you it isn’t difficult, per say, but if you walk away for a hot second to long you’ll come back to a pink slab of tough-mess. Edible, but not savory. I’ve charred more than my fair share of salmon, and I admit it’s still a fish I’m working on. Questionable-ness aside, this is hands down the most delicious salmon meal I’ve ever had.  The glaze was perfect: not too sticky and not too sweet. Unlike the partners on Dancing With the Stars, the glaze and salmon meld together, taking care to work in harmony and not outshine the other one.

Fiscal Flash:  don’t be financially intimidated by this meal. I’ll be honest and say I don’t have the money to buy wild Alaskan salmon which is well managed, full of all the good stuff, and yada, yada, yada. If you are eating salmon on a regular basis then farmed might not be the way to go, but for the occasional meal a little bit of farmed salmon is not going to kill you, just like the occasional Big Mac won’t send a healthy person into cardiac arrest. It may seem tempting and easy to buy frozen filets, which I’ve done before, but don’t be afraid  to venture on over to the fish counter. Look for salmon per pound. Those perfect portion filets might seem the good way to go, but I was able to get 1.20 Lb of salmon for $7.50, whereas each 6oz salmon filet would have cost me $4; you do the math per pound and per serving.  Finally, to skin or not to skin? I’m personally a huge fan of the skin. It tastes great and is absolutely gorgeous to look at, like marbling on a perfectly aged steak (which I haven’t actually seen in real life, but it looks amazing on T.V.)  If you are frying or grilling salmon keep the skin on to make flipping it easy. If you are oven baking it you can go skinless. As with all cook, it’s really up to you, but you’ll likely only find skinless on the pre-portioned selection.

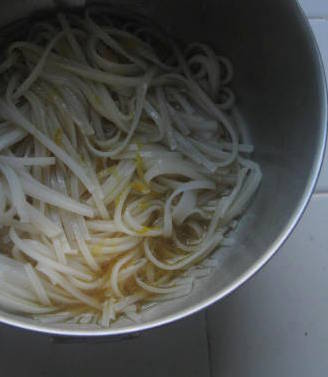
To accompany the fish I used rice noodles, which are very rapidly becoming a key player in my shopping cart. For gluten-free ladies and gents these are a god send. Even better, you don’t have to stand over a hot pot making sure they don’t stick together.  Just place them in a bowl, pour boiling water on top, and let them sit for 5-8 minutes (or whatever the package says.) Drain and give them a quick rinse with cold water. They are a little bland on their own, but great covered in whatever sauce and glaze you are making.

Okay, enough of the nitty gritty. Savor these pictures and check out the recipe.

Gorgeous!


Noodles soaking up the sauce. I let them rest for about 20 minutes and drained the excess.

Lunch!

What happens after “the talent” is done getting pics taken.

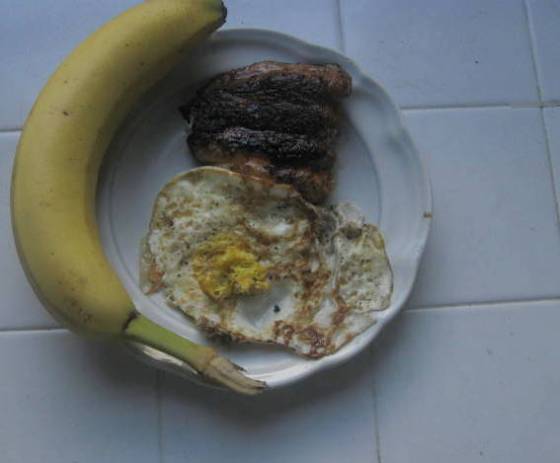
A mix-and-match breakfast! I used the “runt” piece as a taste tester. Boy, I was soooo amped for lunch


Peel Away ❤

Jocellyn


Leisurely Lunches

Lunch has always been a meal I’ve grappled with, and since going GF and DF (gluten free and dairy free) it has only become more difficult. Sandwiches are pretty much out of the question, and even the quick slice of pizza most people can grab on rushed days would send my tummy, hands, and head into a frenzy. Lately I’ve been learning the fine art of leftovers, which are great for days when I have an internship. But on my days off when I have the whole afternoon to myself to languidly slip through the day, I like to get a little creative—I grab my camera for naughty food porn, I listen to some Netflix, and I pad around the kitchen imagining I’m cooking for my dashing, attractive husband in our fabulous beach house; wishful thinking on most accounts, but if I crane my neck, I can kinddddddd of see Lake Champlain….

Until then, I have this to work with.

I’ve been gently re-introducing food, which my taste buds and energy levels are most grateful for, and I’ve found myself craving healthy fats and protein. Some crispy corn tortillas covered in avocado mixture filled with simple spices and runny egg to top it all off and served with a side of two honey and rosemary covered drumsticks seemed like a fresh and healthy idea. Not to mention it was insanely cheap. I bought a package of 5 drum sticks for $3.46 and ate 2 of them. Corn tortillas are less than $3 for a huge bag. One avocado is $1. The spices you probably have in the cupboard (or you can just omit them). Healthy, satisfying, and unique meals don’t need to be super pricey.

If I could change anything I would use a little less salt and up the rosemary

When it comes to chicken breasts I go skinless, but in the case of drumsticks I like leaving the bumpy layer and fatty bits on. Treat yourself 😉

Drizzle some honey on a plate to roll the chicken in before rubbing on the spices

Tinfoil is always, always, always your friend.

The avocado has a rich & cream  mouthfeel, but light flavor. The chicken packs a flavorful bunch. Opposites always attract.


Yes I’m a girl. Yes I Instagram photos of my food. Yes I’m proud of it ❤


Here are the recipes, which I tweaked slightly by adding honey to the drumsticks and tortillas instead of pitas. You might have noticed I used 2 tortillas (with a thin layer of avocado in between to act as glue.) Unlike flour tortillas which are sturdy, corn tortillas are delicate little butterflies. They are also much smaller than their wheaty cousin.

Avocado and Tortillas

Drumsticks


Peel Away ❤

Jocellyn

If only living was as smooth as my smoothies!

It has been a longgggg past few days. About a week ago my world was rocked when shocking rumors were brought to my attention. I was so angry, embarrassed, and humiliated. I hadn’t felt this way since high school, or, well, maybe since the ex-neighbor car incident (hint, hint: it involved the same people. Shock and awe.) I was a complete mess and kind of zombie like, which, if you know me, is pretty uncharacteristic. Thankfully, my good girl friends were there to lift me up; it is so nice to have others lift you up from time to time, as it saves you the hassle and sweat 😉

We celebrated ladies night with gusto, stumbled the night away, and I got to wish a friend a happy birthday.  It was just what the doctor ordered.

But I was still a little upset about the events and starting to feel sick.  If I can catch a cold while it’s still in breathing-on-the-back-of-my-neck mode, I will usually only have a day of feeling horrible and not a week! So I’ve been taking the last few days easy (not that my summer has been exactly a non-stop work fest…ahem), eating what I please, watching Netflix, and sleeping when necessary. Frankly, a cat would be jealous. But in the midst of my laziness and mild emotional eating debauchery (a post to come on that soon), I found the time to make several green smoothies when I was hankering for something sweet to drink while I watched Pretty Little Liars **spoiler alert: I knew it was Mona! …Yes, I’m a bit behind**

You may already know this, but I love green smoothies. In case you’re popping in for the first time, lemme catch you up to speed. When I first started eating healthy, green smoothies were a very clean drink I added to my diet. So, I guess you could say they are kind of like my first born child that can do no wrong. You can whip one up in three minutes, they aren’t nearly as cumbersome to clean up after compared to fresh juices, you get to use the fiber, and you aren’t stuck with a smelly trash can full of left over pulp.

This is what my typical green smoothie looks like. I’ll rotate the fruit around (frozen blueberries are finally cheap enough to buy again and the kiwi was an unexpected add in, but I gotta get to them before the fruit flies do!), and sometimes I’ll use some ground flax seed in place of chia—though I’m totally digging chia at the moment—but this is the basic set up.

I’ve been doing this by feel for the past year and a half, meaning I don’t use exact measurements except with the chia and flax (1 tablespoon). I know what fruit flavors don’t come through as strongly, which, depending on the mood, may mean I’m less liberal with the spinach. I know if I’m using chia seeds to add them in last; if you put them in first they will get stuck at the bottom of the blender and it’ll be a pain in the cheekies to clean. I know pineapple leaves a horrible stringy mess which irritates my texture phobic mouth and gets stuck all up in my teeth. But I have faith you’ll figure out the perfect ratio for yourself!

I really enjoy the energy these drinks give me, and how clean they are, but every now and then I like to treat myself to a “naughtier” smoothie. I was marinating some Moo Ping earlier (yup, the Thai food kick is still going strong), and I had a lot of leftover coconut milk. And thus the coconut milk smoothie happened. This one has a lot more calories since I wasn’t using water at the base, but coconut milk has some great benefits (unfortunately #10 isn’t terribly useful for me!). Consider it a very special treat or make it as a breakfast or lunch for a day you know you are going to be busy and might not be able to snack as often or get in a full meal. I haven’t had a coconut milk smoothie in about 7 months, so I think I can take the calorie and fat hit.

Coconut Milk & Blueberry Smoothie

1 Cup of Coconut Milk (see what I mean! Don’t make this on a daily basis)

1 Banana

1-2 handfuls of fresh or frozen blueberries

1 TBS Chia Seeds


Pour in coconut milk and sliced up bananas. Blend for a few sections. Then add in blueberries and chia seeds. Blend until mixed together, when there is no more white showing.
Peel Away ❤

Jocellyn

Gluten Free Dumplings: Patience, Patience, Patience.

My relationship with dumplings is similar to the situation where you meet someone and really aren’t into them in the beginning, but out of nowhere you start falling for them at space shuttle re-entering the atmosphere speed—so, like, every middle school relationship, right? I had my first dumpling in high school. It was filled with veggies and I wasn’t digging it. Fast forward to freshman year during my short lived semester at High Point University, and I was regularly eating them with Steph and Maria, the two lovely ladies who kept me sane during those horrid months. We’d get together every week to do homework, listen to music, and eat boxes of dumplings. In fact, we had such a good rapport with the local place that one day when they told us the wrong amount, meaning we were short about $15, they let it slide because we were such great customers.

Once I left HPU my dumpling habit diminished and was quickly replaced by even more vodka and Wings over Burlington, which is sort of the rage for all dorm dwellers at Champlain. By the time I learned about the famous dumpling stand on Church Street (Hongs) I wasn’t eating meat, and thus could not partake. When I finally broke my pescetarian ways, I shuffled down to Church Street to gorge myself on a few of the doughy, fatty, bundles of joy. I remember driving with a Styrofoam plate on my lap precariously filled with six dumplings and sauce, stuffing bite after bite into my mouth because I just COULDN’T wait to get home and eat like a proper lady. (Though after admitting yesterday that I licked the sauce off my plate, I guess I’m not really that prim and proper anyway!) Sadly, my plump loves were ripped away from me very soon, as my gluten issue was coming to a catastrophic climax. It would be months before I ate one again. Thank goodness I found a nice gluten free substitute.

I must say that if you are gluten free and haven’t yet worked with gluten free dough, be prepared for frustration, ad-libbing, and acceptance the first few times around. GF dough likes to stick. It likes to rip. It likes to wrap itself around the rolling pin (yes the one that you have already doused in layers of the expensive GF flour mix you normally use at rates so conservative Rick Santorum looks like a bleedin’ heart.) Unless you have some wonderful beginners luck and the magic rolling touch, accept that everything might look a little, erm, not so cue.

Case in point: My dinner tonight.

Dumplings with the look only a mother could love. But you know what, despite their overflowing sides and vastly differing shapes that were sometimes pieced together with excess scraps  and looked nothing like dumplings, they were still very delicious. This recipe was messy, time consuming, and I obsessively checked the water every some often to make sure I wasn’t burning a red hot hole through my neighbor’s pan. I wouldn’t say this will happen on a regular basis (maybe a twice a year treat), but it was oh so worth it.

Gluten Free Pork or Chicken Dumplings


Mischievous Dough Ball


Pork Filling


Bragg’s Liquid Amino Acids. A gluten free alternative to soy sauce (your taste buds cannot tell the difference!)


You flour up with the best of intentions…


…And then this happens three times!


And you still have to do a little bit of wiggling and praying


Something tells me this is too much meat and that I should have cut the dough into squares and not strips…


A valiant attempt.


They didn’t get better looking as I went along, but they steamed fine and tasted mmm-mmm-good.


Peel Away ❤

Jocellyn